In the prior post of this blog series on MCP Express (XE), I introduced the Unisys MCP Express product, discussed its origins and limitations, and described how you can request it from Unisys to download the installation package. In this two-part post, I will guide you through the basic installation and configuration process for XE.
This post, Part 1, covers preparatory steps, installation of the XE software, and initial configuration of the MCP environment. It will take us up to, but not including the point we are ready to halt/load (i.e., boot) the MCP environment for the first time. In Part 2, we will get the MCP running, discuss how to deal with several issues that arise after an initial MCP halt/load, make local networking operational, and start using MARC and CANDE.
At the end of Part 2, you will have a functioning MCP environment on your local Windows workstation. That MCP environment will have a default configuration. It will not yet have many of the MCP features you would normally expect, such as access to external networks, multiple disk families, or printing. Those are topics we will take up in future posts.
Much of the difficulty that people have had getting XE up and running appears to involve Windows 10. I have been installing and using XE on a Windows 7 Pro laptop since the first release in 2015 without undue difficulty -- at least when I followed the directions carefully enough. For this series of posts, however, I decided that I should try to use the same environment that most others are likely to be using.
To that end, I acquired an inexpensive Windows 10 laptop to serve as a clean base upon which to install XE and support this series of XE-related blog posts. It is a Hewlett-Packard Laptop 14 (model CK0061ST). It has a 1.1GHz, quad-core, Pentium Silver CPU, 8GB memory, 500GB hard drive, and 14-inch HD LED display. This is plenty powerful enough to host XE. The 8GB of memory is actually overkill -- 4GB would have been more than adequate.
I don't recommend this particular laptop one way or the other for use with XE -- it's just one of the cheapest I found that is representative of a low-end Windows 10 system. It turns out to work just fine with XE.
The laptop came with Windows 10 Home and the usual collection of "shovelware" you get with a home-class PC. While I originally set up Windows 10 using my Microsoft account and would have expected no problem in continuing to use that, I have since configured Windows to use a local account. I have installed a minimum number of additional applications thus far, just Firefox, Adobe Acrobat Reader, and my favorite text editor.
The laptop also came with a trial version of McAfee Security, which has been enabled. I wanted to see if a typical anti-malware application affected the installation or use of MCP Express. Apparently it doesn't. The trial period recently expired and I will not be extending the subscription. I will uninstall McAfee soon, falling back to Microsoft's free Windows Defender.
The following discussion is based on the current version of XE, 4.0, which uses MCP 18.0 and was released in August 2018. It is possible that the process described below may change for future versions, so please consult the documentation for the version you are installing and use that as the authoritative guide.
Preparation
Prior to starting the installation, you should have downloaded the XE zip file as described in the prior post. I recommend that you name this zip file in a way that identifies its version. For example, I use a convention of this form:
XE1000-MCP18-4.0.zipwhere XE1000 is the style code for MCP Express, MCP18 is the version of the MCP, and 4.0 is the version of MCP Express.
IMPORTANT!
Before unzipping the downloaded file, right-click on the file in Windows Explorer and select Properties from the context menu. If the resulting properties dialog includes a button labeled Unblock, click that button. This will allow certain restricted files to be extracted properly. Failing to unblock the zip file will likely result in a failed installation.
If you have previously installed XE on your workstation, you must uninstall that version before you can proceed to install the new one. See the appendix "Uninstalling MCP Express" at the end of this post for instructions on how to do that.
I suggest that you create a folder in your file system for XE-related files. I created mine as C:\MCP-Express. Then I moved the zip file into that folder and unzipped from that location. If you use the standard Extract All... command for zip files in Windows Explorer, and assuming the name of the zip file I used above, that will extract the files to the sub-folder C:\MCP-Express\XE1000-MCP18-4.0. The disk space required by this folder is about the same as that of the zip file, 2.5GB.
That sub-folder will have the following directory structure under it:
XE1000-MCP18-4.0\
 . Unisys\
 .  . Installation\
 .  .  COD\
 .  .  Images\
 .  .  Install\
 .  .  COA.html
 .  .  DDCse.ps1
 .  .  Installation.xml
 .  .  MIM.exe
 .  .  MIM.ps1
 .  .  SupportLibary.ps1
Inside the Install folder is a Documentation folder. Inside that folder is a PDF document titled ClearPath MCP Express Getting Started Guide.pdf. This document will be installed in a more convenient location shortly, but it is a good idea for you to open it now. It contains the detailed steps you will follow to install the XE virtual machine and set up the MCP environment. If, like me, you are over 40 and work best from paper, then I recommend you print this document so you can easily refer to it during installation and check off the steps as they are completed. The document is 34 pages, but the critical parts are Sections 2 and 3, which amount to only 10 pages -- eight if you suppress the blank pages. I chose to print Sections 1 through 4 as 2-up, double-sided, which requires only six sheets of paper.
I recommend that you read Section 1 ("Introduction") of the Getting Started Guide now, and at least skim Section 2 ("Installing MCP Express") before proceeding. The following discussion will not repeat every step in the Guide. It is intended to supplement the Unisys documentation, not replace it.
Finally, to run the installation process successfully, you must be logged onto Windows with administrator credentials. This means that you must be logged on using the built-in Administrator account or a user account that is a member of the local "Administrators" group. Note that after modifying your Windows user credentials, including group membership, you must log off Windows and log back on in order for the new credentials to take effect.
Installing MCP Express
If there is one thing that will get you into trouble with the installation of XE, it will be failing to follow the instructions in the Getting Started Guide exactly. Do all of the steps in the order presented. Carefully read each step completely before attempting any of the actions it directs. Make sure you have read Section 1 and the first sub-section in Section 2 of the Guide, and have completed all of the preparatory steps above before proceeding. The actual installation process begins in Section 2 with the second sub-section, "Installing the Software."
Installation of the MCP Express package is accomplished using the Master Installation Manager, or MIM. It invokes Windows PowerShell to perform many of its tasks. MIM also can be used later to update individual components of the XE package or to uninstall XE from your workstation.
Assuming you have already unblocked and unzipped the downloaded file, navigate to the Unisys\Installation folder using Windows Explorer and run MIM.exe (not MIM.ps1). After you accept the Windows UAC request to modify your system, MIM will initialize, run Windows PowerShell, and display the MCP Express software license agreement. I recommend that you read this agreement. It is only two pages, and describes what you are and are not permitted to do with MCP Express. A copy of the agreement also can be found under the unzipped Unisys\Installation folder as COA.html. You must accept this agreement to continue the installation process -- scroll to the bottom of the page, tick the Accept and Agree box, and click the Continue button.
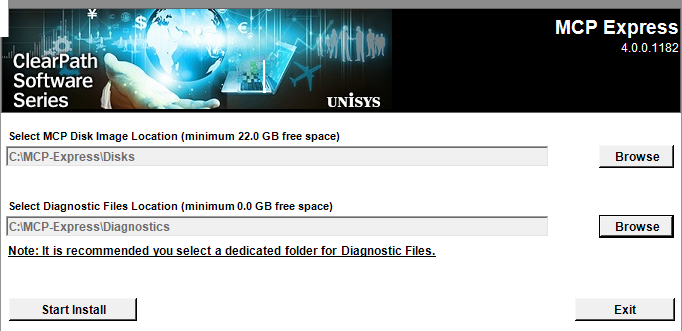
After you accept the agreement, MIM displays a dialog where it asks you to specify the names of two folders in your local file system. The first will be the location where MIM will store the MCP virtual disk image. The second will be the location where XE will store certain diagnostic files. Both folders should be dedicated to their respective purposes and not used to store other files. Neither folder may use Windows file encryption. The folder for the disk image must not use Windows file compression. Make sure your workstation can support the maximum size requirements cited in the Getting Started Guide, although the Diagnostics folder will likely not require anything close to the 70GB that the Guide specifies.
I prefer to place both of these folders under the root C:\MCP-Express folder mentioned earlier, calling the first one Disks and the second one Diagnostics. If later you add additional virtual disks to your configuration, they can go in the Disks folder. The following screen shot shows how I set this up (click the image to view it in a larger size):
This is all the setup the installation process requires. Click the Start Install button to proceed. MIM will display another dialog showing the progress of the installation:
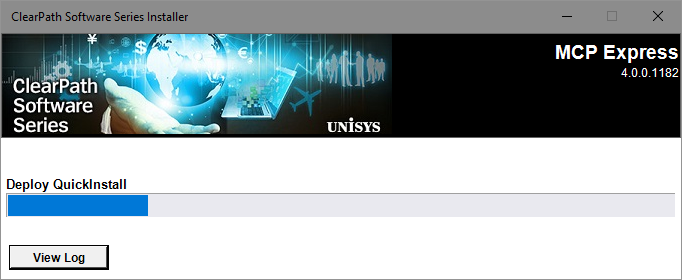
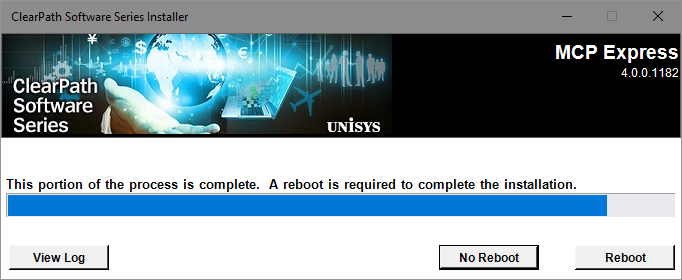
The installation is composed of two main parts: decompressing the MCP virtual disk image -- termed the "QuickInstall" -- and installing the Windows-based XE virtual machine software. You may see several windows briefly pop up and disappear as elements of the virtual machine are installed. Accept any requests for permission to install Unisys software onto your system. On my laptop, this phase of the process took about seven minutes. When it completes, MIM displays another dialog, requesting a reboot of your workstation:
You do not need to reboot at this time, but the installation will not be complete until after the next time you do so. If you choose No Reboot, MIM will simply quit, in which case you will need to reboot manually later.
Once you reboot your workstation, make sure that you log onto Windows with the same administrator account that you used before the reboot. Windows will automatically rerun MIM to complete the installation process. MIM will start PowerShell, which will request permission to run with administrator privilege:

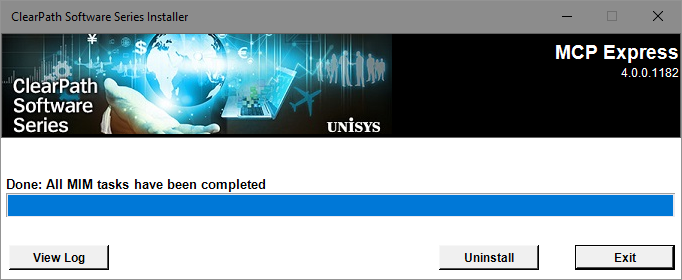
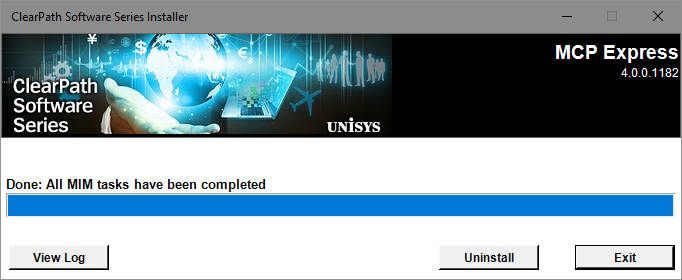
Simply press Enter. MIM will run for several seconds, then display its final dialog. Click Exit to terminate MIM:
Inspecting the Results of the Install
As MIM was wrapping up, you may have noticed a notification pop up near the lower-right of your screen. On Windows 7, it will pop up from the system tray on the task bar. On Windows 10, it will slide onto the screen momentarily from the notifications panel, and will remain posted in that panel. The Windows 10 version looks similar to this:
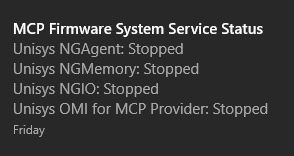
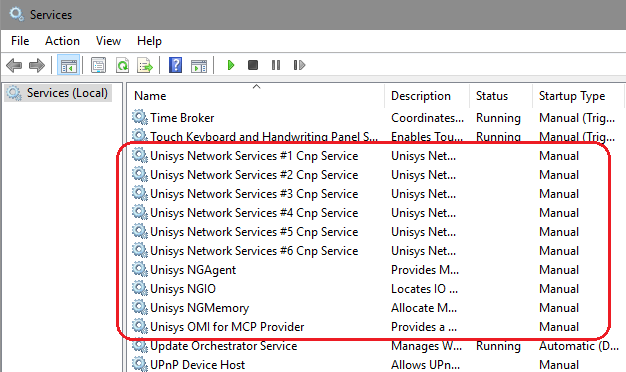
This notification shows the status of the four main Windows services for MCP Express and indicates that XE is presently shut down -- all four services are stopped. If you look at the Windows Services applet, you will see that a number of Unisys entries have been added. These all have a startup type of Manual and are presently not running:
You can see the services for the four main components at the bottom of this list. MIM installs six instances of the networking service, but for XE only one of these is normally used.
On the Windows Desktop, you will see that several new icons have been added. These are shortcuts, so you can move them to a different location, or even delete them (not recommended). I suggest you leave them where they are for now. Do not attempt to open them just yet.
- MCP Console. This is the "control panel" for the MCP environment. We will be using this shortly to create an initial configuration for the virtual machine and halt/load the MCP.
- NIC Configuration Manager. This is a utility program that will configure network adapters for use with the MCP. Its primary purpose is to group multiple adapters into teams for higher throughput. Most workstations that host XE only have one adapter for a wired network, so teaming is not relevant. You can ignore this icon. This is one I usually do delete.
- ODT 1 and ODT 2. These icons will open terminal emulator windows for the two Operator Display Terminals that you use to operate the running MCP environment. You do not need to use both of them, and you can create additional ODT instances, but I have found that running with two ODTs is optimal.
- MARC. This icon will open another terminal emulator window that will connect to the MCP's data communications handler, COMS, and its menu-based user interface, MARC. You will be able to use this terminal to work with MARC, CANDE, and other datacom applications.
- Backup Express. This is a utility that you can use to back up files from the MCP environment to your Windows environment. We will discuss how to use this in a future post.
- Unisys Documentation. This is a shortcut to the folder
C:\ProgramData\Unisys\Documentation. It contains the following:- A shortcut to the copy of
MIM.exethat resides in the installation folder you unzipped at the beginning of the installation process. ClearPath_MCP_Express_Release_4.0.html, which you can open in a web browser. This contains the table of contents for an XE-related subset of system documents on the Unisys support site. I suggest you browse the FAQs and Troubleshooting Tips document at your convenience.ClearPath MCP Express Getting Started Guide.pdf, a copy of the Getting Started Guide document you have been following during the installation process above. This is the more convenient location for the Guide I mentioned earlier.Backup Express User's Guide.pdf, the documentation for the Backup Express utility program mentioned above.
- A shortcut to the copy of
The ODT and MARC interfaces are implemented using the Unisys WebEnabler terminal emulator, which MIM installed as part of the XE package. WebEnabler must be used for the ODTs, but if you have a different terminal emulator that you would rather use for MARC and CANDE, you are free install it on your workstation. We will discuss how to configure other emulators for use with the MCP in a future post.
There is one more important thing to note from the installation. In the directory you created earlier to hold MCP virtual disk images (C:\MCP-Express\Disks in my example above), you should now see a 20GB file named diskxxx.asd. The .asd extension stands for A Series Disk. This file represents one disk unit for the MCP environment. It is a pre-installed, pre-configured, bootable MCP volume, containing the compilers, utilities, and other system software. We will see how this file is used in the next section.
Configuring MCP Resources
The next step in setting up MCP Express is configuring the "hardware" for the virtual machine environment. The details for this step are described in Section 3 of the Getting Started Guide, "Setting Up the MCP Environment."
First, the Windows services that implement the virtual machine firmware must be initiated. These services do not start automatically, so this is something you will need to do every time you want to use MCP Express in the future. The services are controlled from an icon on the task bar's system tray:

- Hover over the system tray on the task bar to see the icon for MCP Firmware Services. A tooltip may pop up indicating the services are presently stopped.
- Right-click the icon and select Run as Administrator from the context menu. Accept any alert requesting permission to make changes to your system. A notification will pop up, showing the four services, each with a status of Stopped.
- Right-click the icon again and select Start Services from the context menu. Additional notifications will pop up, showing the services starting.
- Wait for all four services to attain a status of Running.
- Start the MCP Console. There are two ways to do this:
- Right-click on the system tray icon and select Launch MCP Console.
- On the Desktop, double-click the MCP Console shortcut.
If you try to start MCP Console before the services have completed initialization, it will not be able to connect to the services, in which case you will need to connect manually using its File Connect to... menu selection.
- The MCP environment does not yet have any resources configured for it. We will use MCP Console and its System Editor utility to create an initial configuration. This configuration is stored in a file known as a Peripheral Configuration Diagram, or PCD. You can have multiple PCDs, but only one can be active at a time.
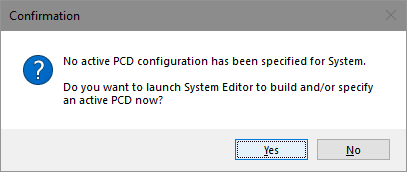
The first time you run MCP Console after installing XE, it will notice there is no current PCD and ask to create one:
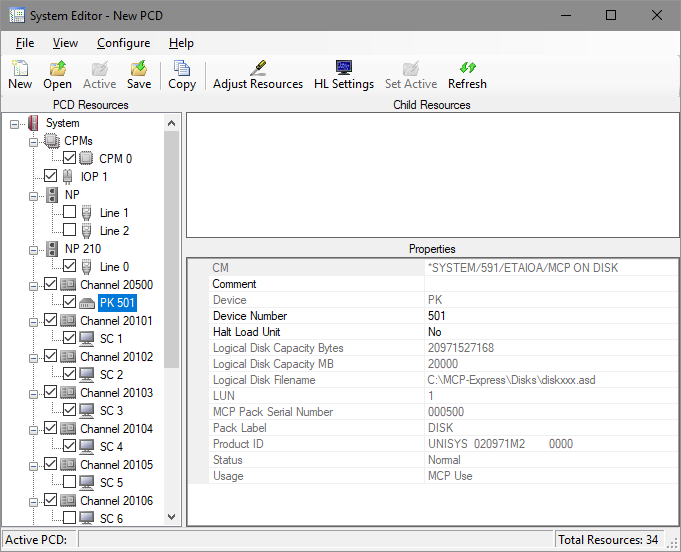
Reply "Yes" to this alert. MCP Console will start its System Editor utility, which in turn will discover resources on your workstation and create the data for a default PCD. The left pane of the System Editor window will then show a tree representation of the resources and their relationships. You can click on the nodes of the tree to see details for each resource. For example, clicking the PK 501 node reveals information about that virtual disk unit. For now, just accept this default configuration.
This System Editor window shows that the configuration has one CPM (data processor), one IOP (I/O processor), NP 210 (the network processor) its with Line 0, PK 501 (the disk pack unit for the virtual disk file diskxxx.asd created by the XE install), and twelve SC units that represent ODTs. We normally need only two of these ODTs, but it does not hurt anything the leave the others in place. There is also an undesignated NP node with two lines that are not presently selected. We will make use of this in a future post to connect the MCP to an external network.
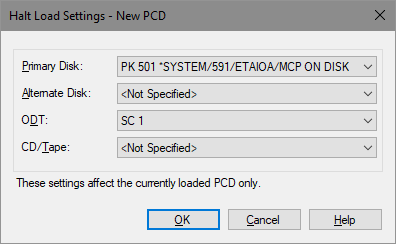
Next, we need to specify the devices the MCP will use during its initial boot process. Click HL Settings on the toolbar. On the resulting dialog, select the disk pack unit (PK 501) as the Primary Disk and either SC 1 or SC 2 as the ODT. Leave the Alternate Disk and CD/Tape entries unspecified, then click OK.
In the tree of resources in the left pane of the System Editor window, you will see that the disk pack and ODT units you selected are now highlighted in green, indicating their status as halt/load devices. Click the Save icon on the toolbar and enter a name for the PCD file. I like to put the date in the file name, e.g., XE-20181117.pcd. Enter a comment describing the PCD if you wish.
Back on the System Editor window, click the Set Active icon on the toolbar. This will mark the currently-open PCD as the active one, meaning it will be the configuration used the next time the MCP is halt/loaded. Configuration of MCP resources is now complete, so close the System Editor window.
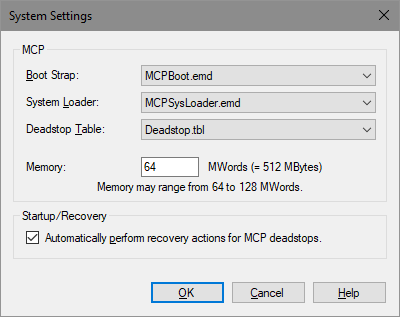
On the MCP Console window's toolbar, click the System Settings icon. This opens the following dialog:
I point out this dialog because this is where the memory size for the MCP environment is specified. You can change this if you wish, but the default 64 million words is normally more than sufficient for personal MCP use. Note that each MCP word occupies eight bytes of Windows memory. I recommend that you cancel this dialog without changing anything.
This concludes Part 1. We now have a virtual machine and MCP environment that should be set up and ready to use. Part 2 will pick up at this point, load the MCP, and continue with setup tasks by using the active MCP environment.
Appendix: Uninstalling MCP Express
You may need to uninstall MCP Express in order to install a new version, reinstall the existing version, move it to another workstation, or because you simply want to get rid of it. As the Getting Started Guide emphasizes, you must not attempt to uninstall XE or delete its components manually. Instead, you must use the installer program, MIM.
In order to uninstall a version of XE, you must use the MIM.exe utility from the same package that installed it. Before you begin, make sure that the MCP Express environment is completely shut down. Open the Console for MCP utility and determine that the environment is not running -- under the MCP View pane, the root of the tree should read "System - Load Required" and all components should show a status of "Offline." Click the Halt button on the MCP Console toolbar if necessary and wait for the shut down process to complete.
When you run MIM (make sure you use MIM.exe, not MIM.ps1), it will start Windows PowerShell and prompt you for permission to run as Administrator. You must grant that permission. After initializing, MIM will display the following dialog box:
Click the Uninstall button. MIM will then display this dialog:
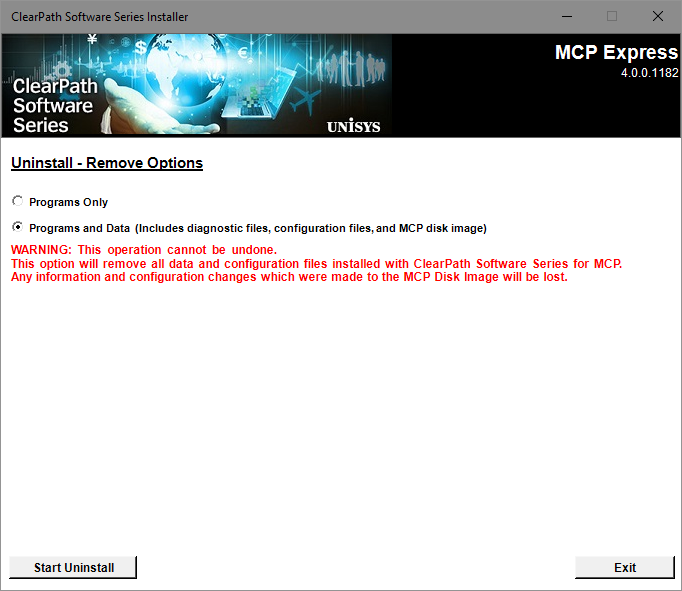
Make sure you tick the Programs and Data option under Uninstall - Remove Options, otherwise you may not be able to reinstall any version of XE successfully.
Note: Selecting the Programs and Data option will remove the MCP's default virtual disk file (
diskxxx.asd, usually representing the familyDISK). If you have files on that virtual disk you want to keep, then either back them up first, or copy or move that.asdfile to another location. Do not copy or move any.asdfile while the MCP is running -- that could leave you with a corrupted.asdfile. Uninstalling MCP Express using this option will not affect any other.asdfiles you may have created.
We will discuss in a future post how you can add an .asd file back into a configuration later.
To proceed, click the Start Uninstall, button. The uninstall process will take several minutes. You will probably see a number of widows flash open and close -- this is normal. Accept any Windows UAC alerts requesting permission for the program to modify your system. Once this phase of the uninstall completes, you will be prompted to reboot your Windows system. Do so at that time.
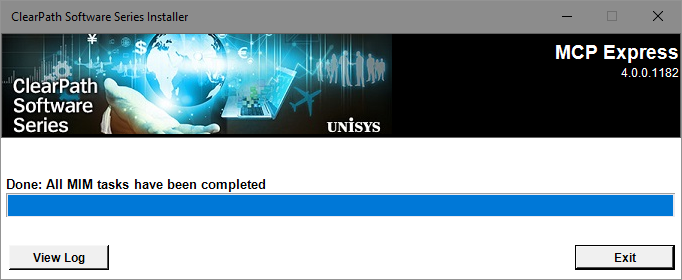
After Windows reboots, MIM will restart automatically and perform the final uninstall tasks. When it finishes, it will display this dialog:
Click the Exit button to terminate MIM. XE is now completely uninstalled from your workstation. You can find additional information on uninstalling XE in Section 4 of the Getting Started Guide, under the heading "Uninstalling MCP Express."

